Building a Veeam Repository – Cost vs. Performance
Earlier this year I wrote a few posts (here, here, and here) where I collected a bunch Veeam Repository Best Practices; the purpose of those posts were somewhat two-fold at the time: a) I needed something to present at my first SWOVUG meeting, and b) I desperately needed a new repository at work. Despite being several months later, I still seem to be getting questions about what repository I went with and how I like. I figure if I at least blog about it I can point future questions here.
@ClintWyckoff Supermicro SYS-6037R-E1R16L; our full data is about 4TB – this gives us a balance of disks vs. cost. Currently on an older SAN
— Matt Crape (@MattThatITGuy) January 29, 2016
I ended up going with a SuperMicro SuperStorage Server 6037R-E1R16L. SuperMicro isn’t what I would consider a common brand name (yet), particularly for anyone outside of the IT circle. I had a bit of experience with their products in the past and I was quite happy with them: the build quality was good, the IPMI interface was decent, performance was excellent, and the price was hard to beat.
WHY DID I GO WITH THIS?
 First off, I was trying to solve two problems: backup window length and storage capacity. On the backup window side of things, my fulls were taking about 40 hours. I could run them on weekends, but if I ran into any trouble (power issues are very common at my location), the job would fail and I likely wouldn’t be able to run it again and stay within the target backup timeframe.
A large part of the problem with the backup window was my repository – I was writing this to a NetApp FAS 2020. I had 5 shelves comprising of a mix of 7200 RPM 1TB and 15K RPM 500 GB SAS drives. When I would run a backup with Veeam, it would beat the SAN to a bloody pulp. Yes, I was using a CIFS share, but still … performance was bad. It was particularly bad when creating a Synthetic Full (Side note: Active Fulls might have been a better choice here, but the time to run those was still quite long. Due to the slow processing, production was impacted during these times (vs. a synthetic just killing the backup repository). A large window still was not ideal even if it meant the actual job was shorter).
The other issue I was running into was capacity. Despite all those drives, I still only had about 10 TB usable. My production footprint at the time was somewhere around 4TB, so I could get a full in there, but if you add about 30 restore points, things started getting a little tight. I also had to be conscious of any extra space on the Veeam side for things like transforms which would eat up precious space and potentially lead to jobs throwing errors.
PERFORMANCE
A large part of why I went with the SuperMicro machine was I needed good value for the money with my budget. What really attracted me to it was all the drive bays. This would potentially solve two issues for me: a) with all those drive bays, I could keep adding more storage as needed (especially with 4 TB drives getting cheaper by the week), and b) the more spindles = better performance. I also ended up putting in two SSD drives, which I’ll expand upon a bit more below.
 Since it wasn’t in production yet, I wanted to take the time to do some testing. This testing wasn’t just to see how well the storage performed, but it gave me an opportunity to test out different backup methods in Veeam (incremental vs. forever forward vs. reverse incremental). It also was a chance to play around with some features in Windows Server 2012 R2 that I’m not overly familiar with, specifically Storage Spaces.
I ended up doing a bunch of tests with Storage Spaces which involved performing an Active Full backup. You might notice some odd stuff, like for example Dual Parity has such a small amount of capacity. I believe this was caused by the fact that I only had two 120GB SSDs in the volume array. For reference, the VM I was backing up was ~ 400 GB that had near zero change rate during the tests, and this was all over gigabit ethernet (no 10G 🙁 ).
| Windows Server 2012 R2 | ||
| Type | Size | Full Backup time |
| Single Parity | 25.6 TB | 1:40:36 |
| Dual Parity | 660 GB | 2:09:36 |
| Mirrored | 14.6 TB | 1:34:27 |
| Striped | 29.2 TB | 1:36:24 |
| FreeNAS | ||
| Type | Size | Full Backup time |
| RaidZ | 21.82 TB | 1:55:52 |
| RaidZ2 | 14.55 TB | 1:55:58 |
| Mirrored | 7.27 TB | 1:56:28 |
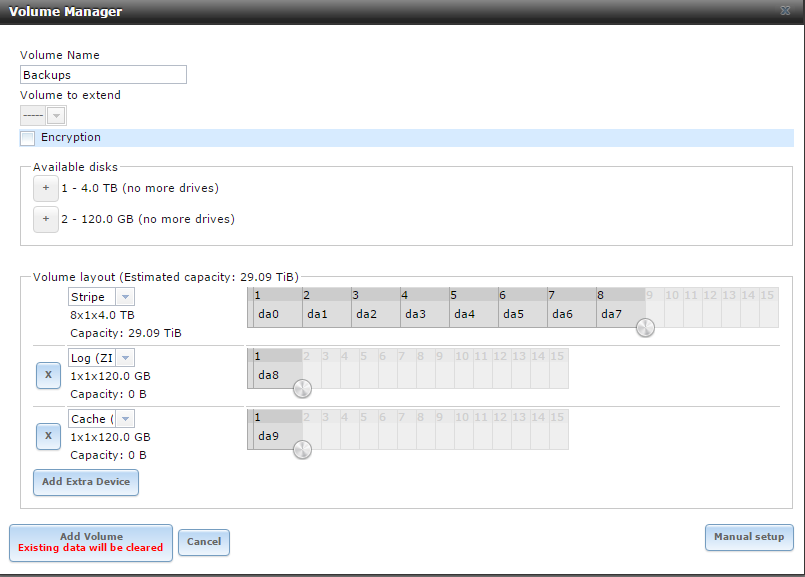
| Striped | 29.09 TB | 1:34:07 |
Ultimately I would like to have gone with a Windows Server 2012 R2 install on the machine. Between the per-VM file chains, Windows Dedupe, and leveraging Veeam’s integration / data mover services, I think it would have made an interesting addition to my environment. Alas, the budget got in the way. I opted to throw more money at the hardware (vs. spending on an OS license) and instead I went with FreeNAS (with the SSDs being used for a ZIL and L2ARC). Given how similar the times were, there doesn’t seem to be a huge benefit between either solution with similar setups.
On that note, also keep in mind that the above numbers are for an Active Full only, I didn’t touch on things like transformations.With that being said, don’t forget about the changes with ReFS in Windows Server 2016.
So what’s the takeaway here? Know the environment that you are backing up – what do you need from a capacity perspective, how fast / efficient do the backups need to be, and what’s the budget. In my case, my solution may not be high-end, but it solved all of our problems and has given us room to grow. The total cost for the above was ~ $5000 CDN.


Pingback: Veeam Office 365 backup, non-domain accounts, and UNC shares | Matt That IT Guy
How many vms are you running?