One of the newly introduced features in Veeam Backup & Replication 9 is Scale-out Backup Repositories (SoBR), and frankly I have been waiting to try this out. This is a fantastic solution that will be welcomed in a lot of environments, large and small. The concept behind it is that many of us have small ‘islands’ of storage - maybe a SAN, some NAS storage, and / or some direct-attach somewhere. Previously it would have been a real pain to leverage all of these as you would have to setup a separate repository for each ‘island’ and then maintain the jobs to make sure that a) there will be enough space and b) keep track of what is going where.
Well that has changed with SoBR. Now Veeam can take an inventory of the available ‘islands’ (location, capacity, disk type), and present it as one repository for your backups. In addition to the optimized use of storage, you may very well see a performance gain as multiple streams can be written to different repositories at the same time. Of note is that this feature is only available in the Enterprise and Enterprise Plus licenses. Enterprise allows up to 3 extents to use as repositories while Enterprise Plus offers unlimited extents.
I wanted to put together a test environment and figured I might as well blog it for future use. This environment is fairly simple - 1 DC / Veeam server, 3 SoBR servers, and the vCSA. Each of the three SoBR servers were setup with a 40 GB drive that I plan on using for the repository (small, yes, but this is just a test) and they are all joined to the same domain.
Note that you can click on any of the pictures to see a higher res version.
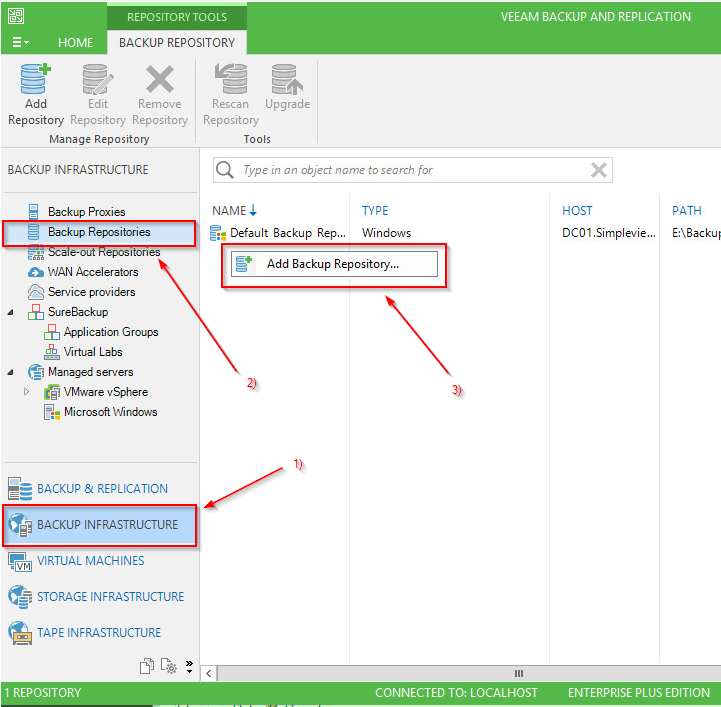
To get the ball rolling, the first thing we need to do is add these servers as regular Backup Repositories. This can be done by going to the Backup Infrastructure tab, select Backup Repositories, and then right-click on the right-side pane and choose Add Backup Repository.
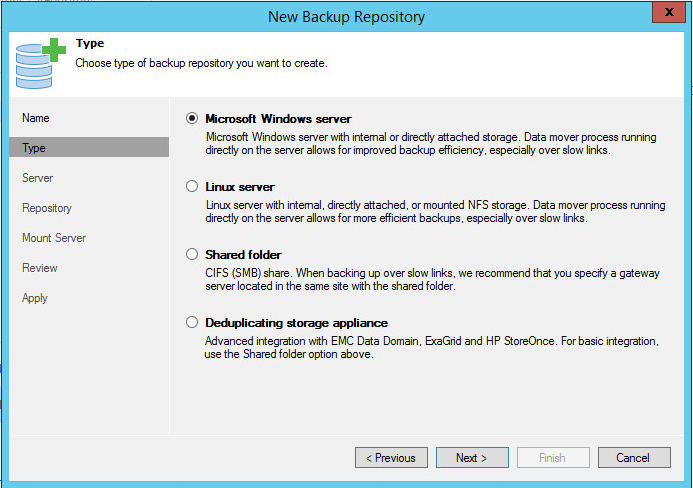
Once you get the Wizard going, you’ll want to give the repositories meaningful names. In my case I will call them SoBR-01, SoBR-02, and SoBR-03 as those are the server names. On the next screen, choose the appropriate type of repository. In my case these are all Windows servers, but this will vary from environment to environment. A bit of a side note: CIFS is usually recommended as a solution to avoid as there are a lot of issues that stem from SMB clients.
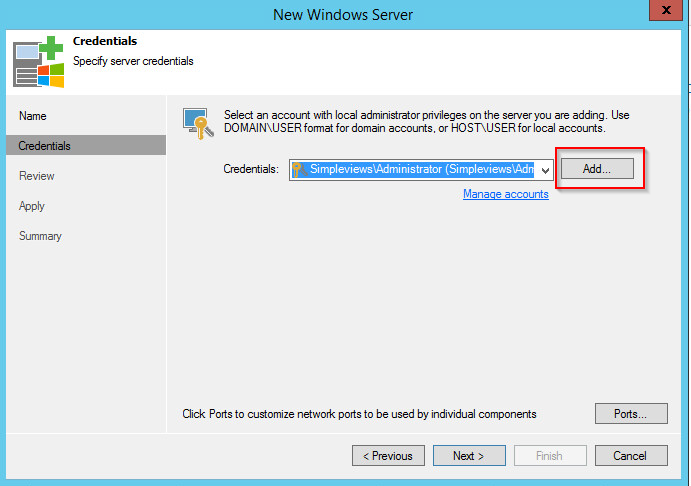
 Next up is the Server portion of the wizard. This is where we will need to add the servers into Veeam. Hit the ‘Add New’ button which will start up a new wizard. Enter the requested details in this wizard such as hostname and the credentials required to login to install the agent software. If you need to add credentials in order to log onto the server, click the Add button on the credentials page.
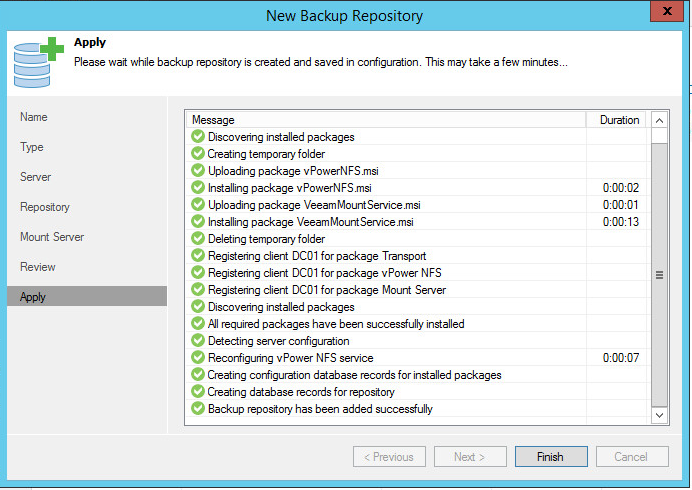
 Once you are done with setting the credentials, hit Next and finish up the New Server wizard. If you run into an error while performing the Apply step, be sure to check to see if Windows’ firewall is getting in the way. When all is said and done you should see a screen similar to this. Lots of green checkmarks = good things.
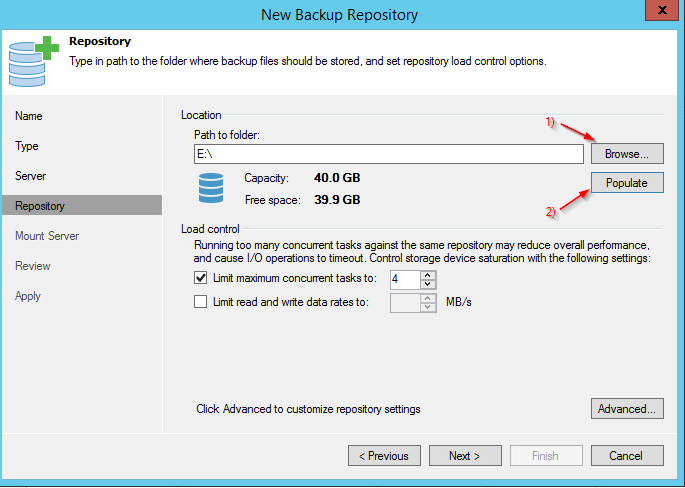
 Hitting Finish brings you back to the New Backup Repository wizard. I took the opportunity now to just add the other two test servers I had, but this can be done after the fact as well. Select the server that we want to add as a repository and hit Next. We’ll now get an opportunity to assign the storage volume from that server - click the Browse button and find the volume that you want to add, and then hit the Populate button. If everything looks good, hit Next.
 On the next screen lets leave the vPower NFS service enabled (default) - you likely want to leave this enabled for performance. Hit Next. At the Review screen we have the option to import existing backups - since this is a new repository I won’t have any backups there, so I’ll leave it unchecked and wrap up the Wizard. Hopefully you’ll end up with a bunch of green check marks.
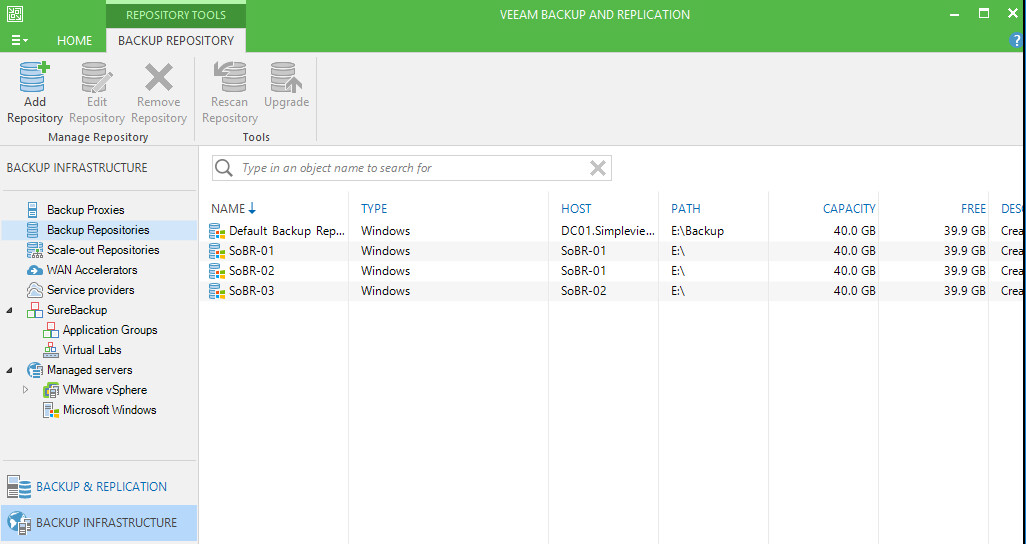
 In my case I had to go through adding the other two servers as backup repositories following the same steps as above; when all is said and done, this is what my repositories look like.
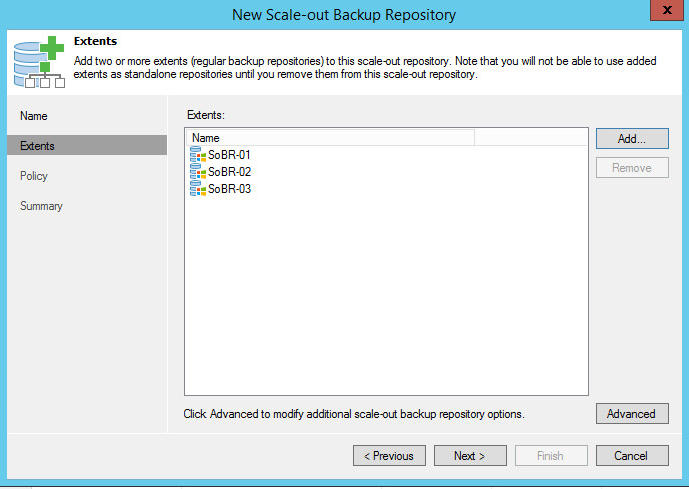
 Now to create the SoBR - select Scale-out Repositories, and then right click on the right-side pane and choose ‘Add Scale-out Backup Repository’. Give the repository a decent name and hit next. This is where we add all of the repositories that we created earlier. Click on the Add button and check off the repositories that we want to add and hit OK. I choose to exclude the local repository from this example, but it could have been added in as well. There is a caveat though - you cannot add a repository that is used as a Veeam Configuration backup target.
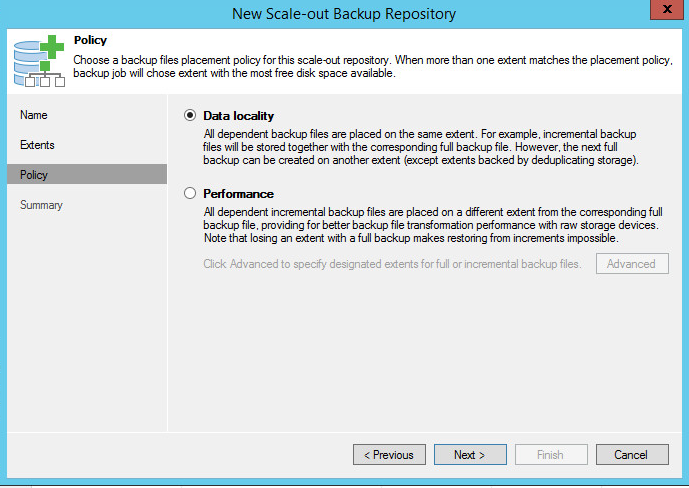
 Next up we need to make an important decision which determines how the scale-out backup repository is used. It can either be used to keep all related files together or to spread them apart for performance. When they are spread apart the incremental backup files are placed on different repositories - this can be dangerous in that if you lose a repository you will break your incremental backup chain. This is something that will need to be assessed in every environment.
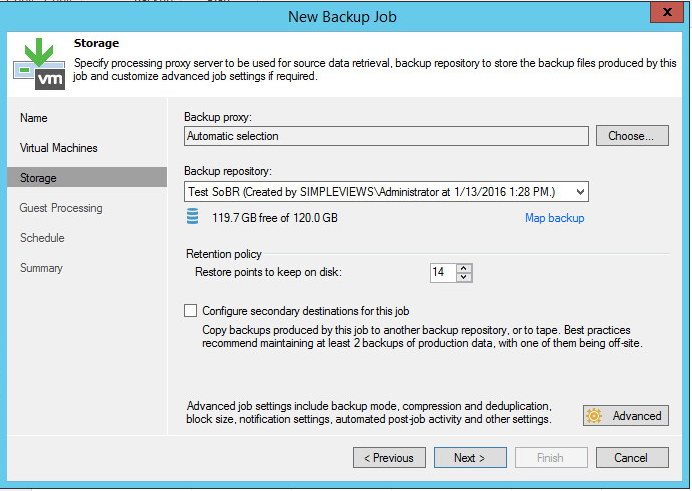
 After choosing your repository type ,hit next, finish up the wizard, and with that the SoBR is setup; it is now available as a backup repository for your backup jobs. Note how the repository show a total size of 120 GB - that is the combined space of my three 40 GB drives that I added from each server.